My Love/Hate Relationship With 3D Printing
Yes, we at Purple Pill developed a camera that can film on all sides at the same time in stereoscopic 3D, and we were crazy enough to open-source these designs. Now everyone with an idle 3D printer can print their own 360º stereoscopic virtual reality camera system. In this article we share some valuable tips and tricks we learned during this process.
Let’s get things straight, 3D printing is not as easy as it sounds. 3D printers are like puppies; you take care of them, feed them, take them out for a walk, and they are almost hypnotising to look at, but in the end they will still crap on your carpet until you get them housebreak. It’s the same with 3D printers; you have to maintain them, feed them with quality filament, then train them to get a good final result, and believe me, they are definitely hypnotizing to look at, but are hard to tame.
Don’t get me wrong 3D printing is great and will be a game changing technology in the upcoming years. But because I don’t want you to make the mistakes I made, I will give you some tips that will come in handy when you are printing your own 360 camera rig. For everybody that is not an expert in 3D printing, you can skip till the end where you can find the G-code files and print settings, but I suggest everybody who is new to 3D printing to stay with me.
Cost vs. Maintenance
There are a lot of 3D printers available these days, but most home 3D printers range in price between $1800 dollars and $3000 dollars. More expensive does not always mean it is a better printer, most of the time they have the same building platform and the same print resolution and they all have the same steep learning curve.
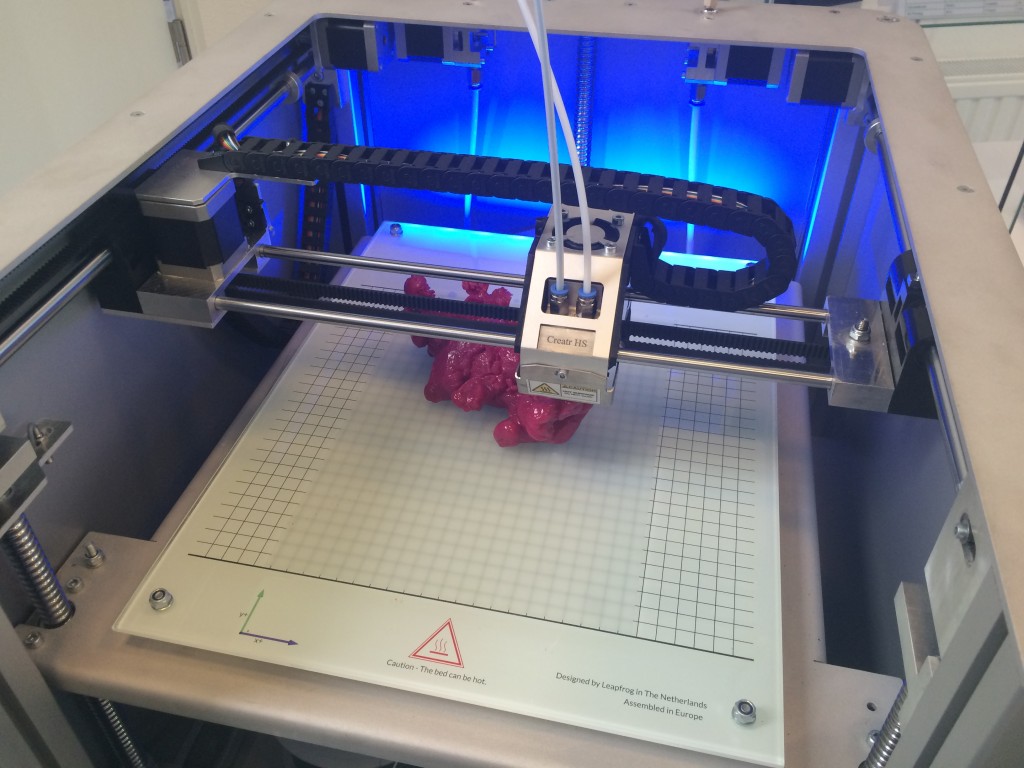
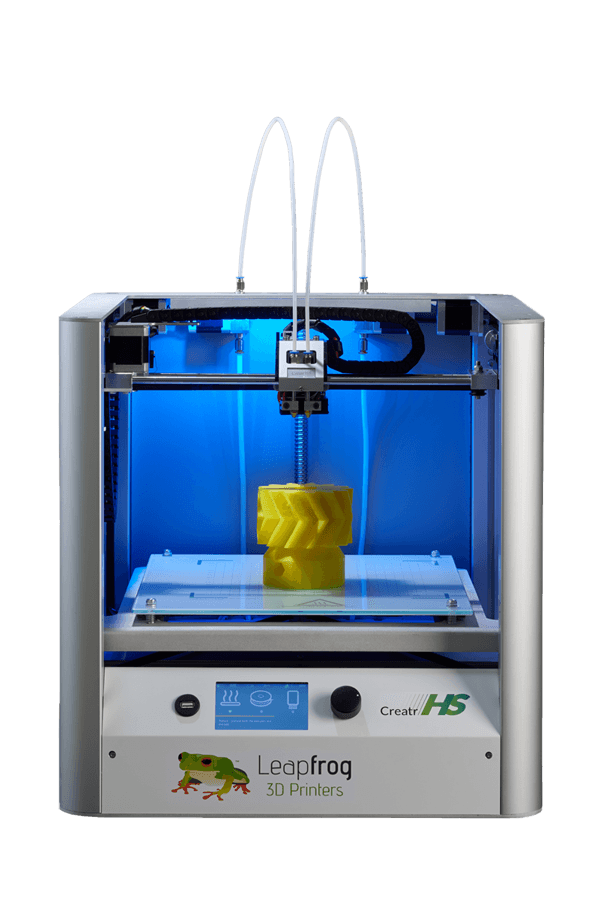
Where they differentiate is the necessary maintenance, print speed and build quality. We at Purple Pill VR use two different models of 3D printers: the Ultimaker 2 and the Leapfrog HS. If you like to know what the inside of a 3D printer looks like, get an Ultimaker, because you have to deal with clogged nozzles, burned temperature sensors and filament that won’t get through the extruder because it has a filament feeder that comes straight out of a surprise egg.
I know the Ultimaker is a 3D printer that you have to modify to get it working properly, but I really can come up with 100 fun activities, and none of them include fixing a 3D printer that should have worked in the first place. So if you have some money to spend, buy a Leapfrog, because it will save you both time in maintenance and print speed. On top of that, they are built as a tank, come pre-calibrated, have very good support systems, and have a bigger building platform. This last feature allows you to print bigger objects in one print, instead of having to glue them together afterwards..
The Right Filament
You can buy a lot of different filaments these days, ranging from PLA and ABS (most common) through exotic materials that conduct current, change color at a certain temperatures or dissolve in water. For our model we will stick with PLA or ABS. PLA is sugar based, easier and faster to print, and sticks easier to the printing bed (it also smells better during printing).
ABS is oil based, has better heat and structural properties, and is more durable. However, it is much harder to print than PLA. I only recommend ABS when you really know what you are doing, especially when it comes to large prints (like our model) because it has the tendency to curl from the printing bed (even when you have a heated bed) and will get your nozzle clogged much faster. I actually always use PLA, because you can print it faster and the risk of failure is much lower than with ABS.
First Layer is Key
Every house needs a good foundation, and it’s the same with 3D printing, because every layer is built on the previous one. The rig that you are printing has a lot of detail in the first layer and it has to be perfect to get the whole print right. Every mistake made in the first layer will come back at you later on in the print, resulting in parts that won’t fit, support structures that will come loose, or worse.
Yes, this a 3 days old 3D printer that scooped up the print after a couple of layers because the first layer did not stick well to the bed and the bed was not completely level. It coughed out filament for a good 10 hours when I was out of the office and this piece of art was the end result.
So how can you improve the first layer? First, pick a material that makes your bed sticky. I use print stickers with my Leapfrog, but some hair spray or kapton tape works just fine as well. Second, print very sloooooooooowwww. And I mean slow like watching mushrooms grow slow. Normally it’s recommended to print the first layer at 30% to 50% of your normal printing speed, but I generally go for 10%. This gives time for the print to really stick to the adhesive and gives you time to make minor adjustments in print settings, like print temperature and leveling the bed.
If you want to know more about adhesive materials read this article about – ‘Bed Adhesion and Squish’.
If you want to know more about adhesive materials read this article about – ‘Bed Adhesion and Squish’.
Print Settings and Support Structures
Alright, here we go, these are the print settings I use with my Leapfrog. Of course these settings will change depending on your machine of choice, but they give you a general idea of the quality we are looking for. I use Simplify3D as my software of choice, and I save my prints to an SD card or USB stick for printing, because having the printer connected to your computer can sometimes result in errors, especially with large prints.
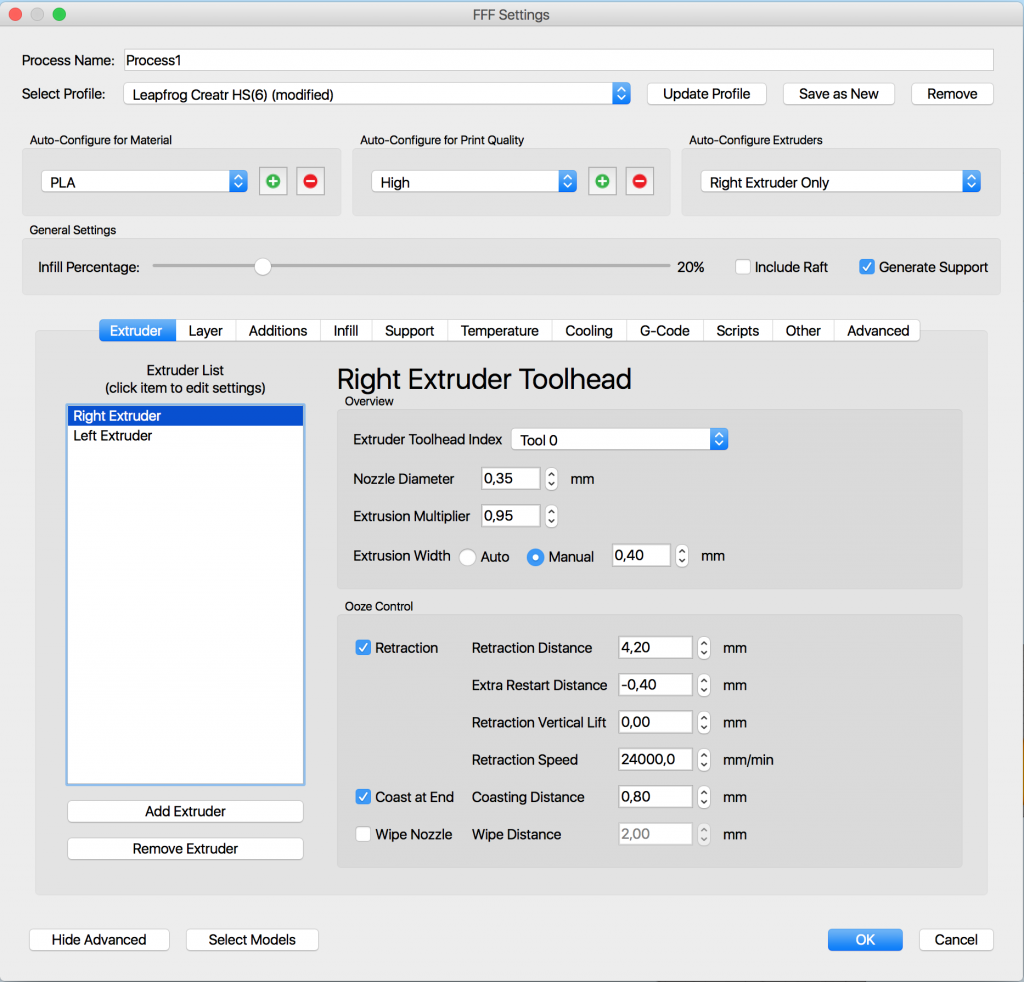
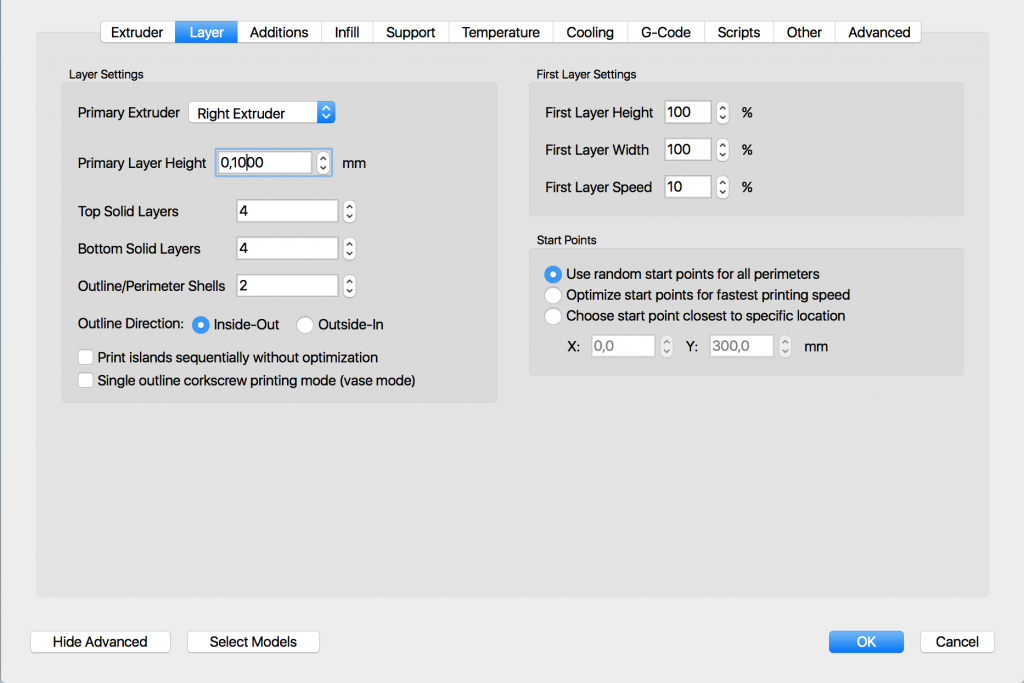
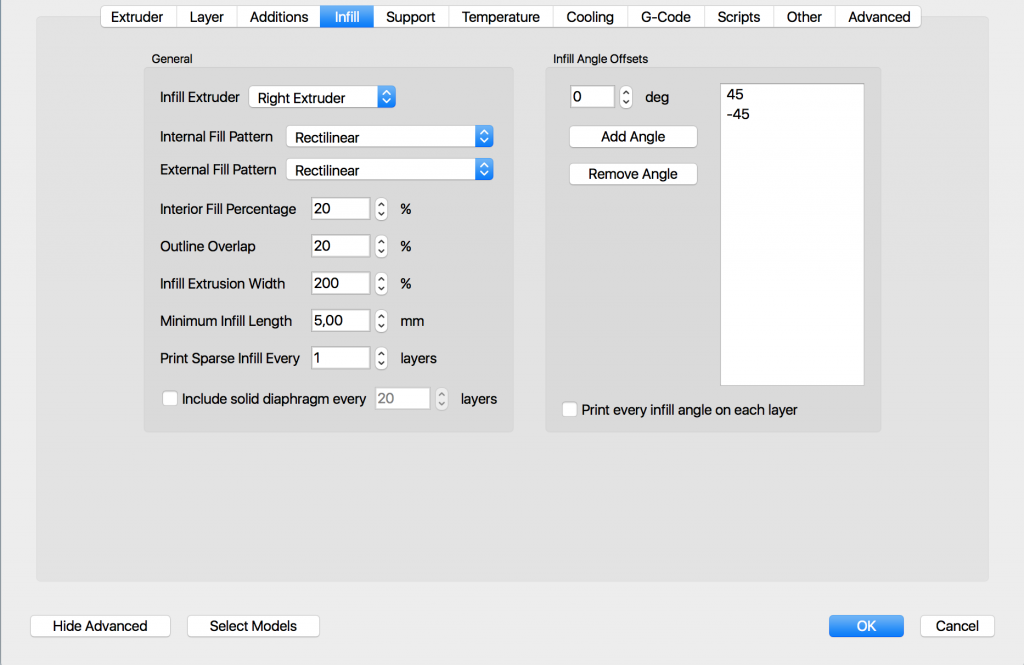
You can get the .STL, Solid Works and, G-code files here, including all of my printer settings for a Leapfrog HS and a list of parts and suppliers. The whole print time for the 16 camera design is about 3 days. If you decide to modify our designs, we would love for you to share them in the Purple Pill forum, so that other pioneers can benefit from your work.
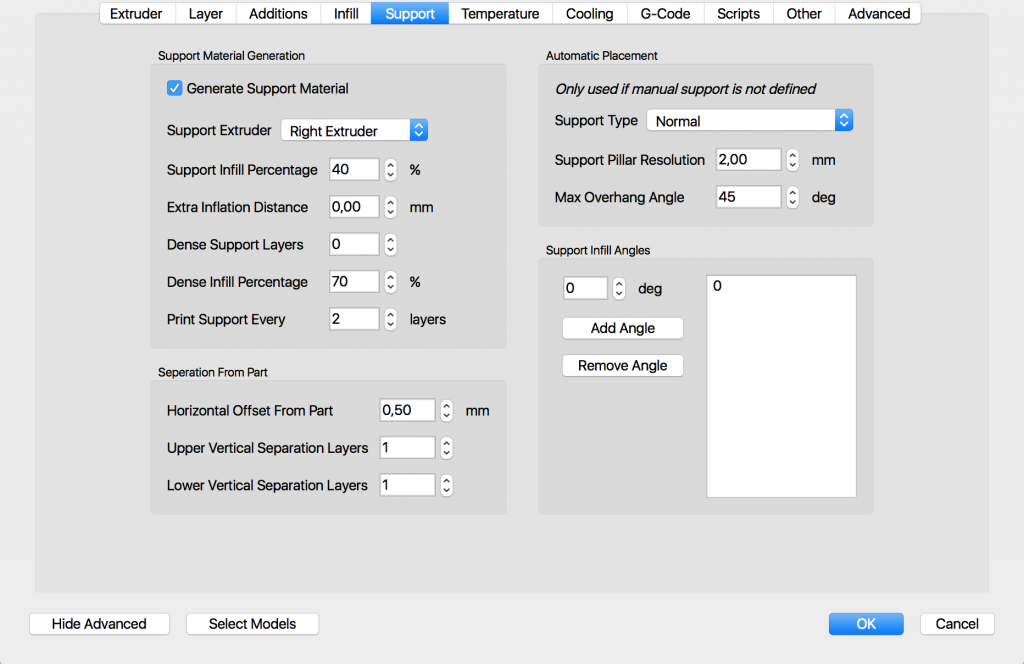
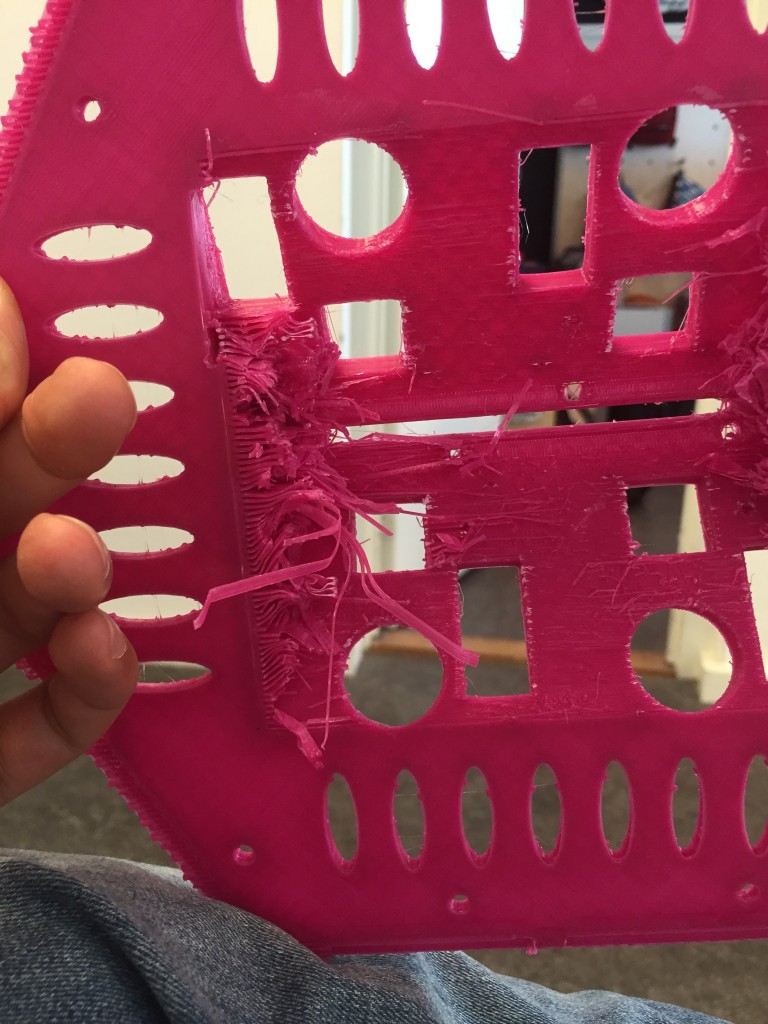
Support structures are obviously very important. For a good print we tried to minimize support structures in our prints, but you can’t get around them completely. There is nothing more frustrating than seeing a finished print and you can’t get out the support structures out because they are stuck to your print like this.
Make sure they have a horizontal offset of 0.5 mm or more so you can get your material out with ease. If you are happy to have a 3d printer with dual extruder, you can print support structures in easy-to-remove PLA or PVA, which dissolve in water. Both of these materials are hard to print so for experts only.
Some Final Tips
Always print directly from a usb or SD card
You can use software like Simplify3D or software that comes with your printer, but then you have to connect your printer through USB to a computer. I have noticed especially with large prints that sometimes the connection fails and your printer stops in the middle of the print.
You can use software like Simplify3D or software that comes with your printer, but then you have to connect your printer through USB to a computer. I have noticed especially with large prints that sometimes the connection fails and your printer stops in the middle of the print.
Make sure the bed is completely level and well calibrated
This sounds obvious, but I have made this mistake too many times, ruining two 3D printers. A good tip to know is to listen after the first layer is complete if your printer makes any scraping sounds caused by the printer head moving over the first layer.
This sounds obvious, but I have made this mistake too many times, ruining two 3D printers. A good tip to know is to listen after the first layer is complete if your printer makes any scraping sounds caused by the printer head moving over the first layer.
Don’t compromise quality for speed
3D printing takes a long time, so make sure you get it right on the first go. Of course you can print with a higher layer height or increased print speed, but most of the time you will end up with a bad quality print and you have to do it all over with more precise settings.
3D printing takes a long time, so make sure you get it right on the first go. Of course you can print with a higher layer height or increased print speed, but most of the time you will end up with a bad quality print and you have to do it all over with more precise settings.
If you have to glue parts together, use locktite
If you have a 3D printer that can’t print the complete mount as a whole, you can use Locktite 401 to glue your parts together. Don’t rush this job, because you will never get the parts loose again.
If you have a 3D printer that can’t print the complete mount as a whole, you can use Locktite 401 to glue your parts together. Don’t rush this job, because you will never get the parts loose again.
Use quality filaments
Don’t use filaments from eBay etc., because they are usually bad quality and vary in thickness, which can cause severe damage to your 3D printer. Read more about choosing a good filament here.
Don’t use filaments from eBay etc., because they are usually bad quality and vary in thickness, which can cause severe damage to your 3D printer. Read more about choosing a good filament here.


