One of the difficulties of FDM printing is retaining the heating factors that allow for a successful print. While high-end printers are precise in this regard, not everyone can be quite as lucky. Thus, many enterprising users resort to the use of heating enclosures.
A heating enclosure is any obstructive shell for a printer for the purpose of preserving temperature conditions. To put it simply, its a box to keep the heat in and prevent external factors from altering the print conditions. Enclosures can stabilise the print area, neutralise external factors that affect the print and they prevent warping. This makes enclosures particularly desirable for ABS printing.
There are a variety of ways one can enclose their printer. Printers can have single or multiple doors. Materials can also vary from one design to the next. Some models are acrylic, others can be metallic. These range from simple DIY, complex DIY and printer specific enclosures.
3D Printer Specific Enclosures

3D Printer specific enclosures are ones designed with a particular printer in mind. While this makes them more reliable it can also hike up the price. These are professionally made and are therefore far more suitable. They are often provided by the companies themselves. Generally, the difficulty level of installation is also much simpler because it’s shape is specific to the printer.
Enclosures like this are available on online outlets like Amazon and Ebay. They can also found in the form of printable files found on sites like thingiverse. While some printer specific enclosures are complete kits, others may require users to print latches or locks to complete the kit. Some kits are as simple as using a hex driver to tighten screws, while for other users have to glue or drill them.
A few of the available enclosures include:
- LulzBot Mini Enclosure by Printed Solid
- BuzzBox Single Door Enclosure for Afinia and TierTime Up 3D Printers
- Enclosure for Makerbot Replicator Style 3D Printer
Simple DIY 3D Printer Heating Enclosures
Hats off for 3Delight from the Prusa3D forum
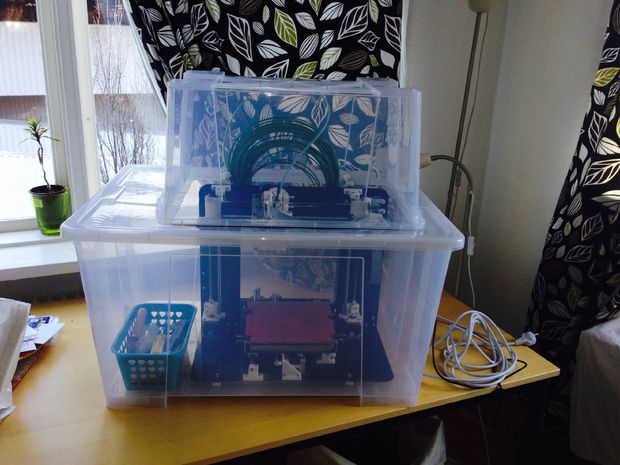
Simpler DIY solutions are the cheapest option to go down. Since a lot of high-grade enclosures can be costly, DIY solutions might be the way to go. The simpler DIY arrangements can certainly help but they need to be done properly. For example, the arrangement above uses acrylic boxes to contain the heat. It is composed of 2 boxes slapped together and reconfigured with a cutting wheel.
Simple DIY types need to cover the necessities only. Creators need to remember to make place for the wires to go in and out easily. Since the maker has to set the exact size of the enclosure, it’s important to give ample space for the printer to move in all 3 axes.
The shape of the enclosures also needs to conform to the filament loading mechanism and the extraction of completed prints. Additionally, users need to take into account how to best place the printer to adjust values like bed levelling and jamming in case of print errors.
Here’s a video by Matterhackers on how to build a cheap enclosure for your printer:
Complex DIY 3D Printer Heating Enclosures
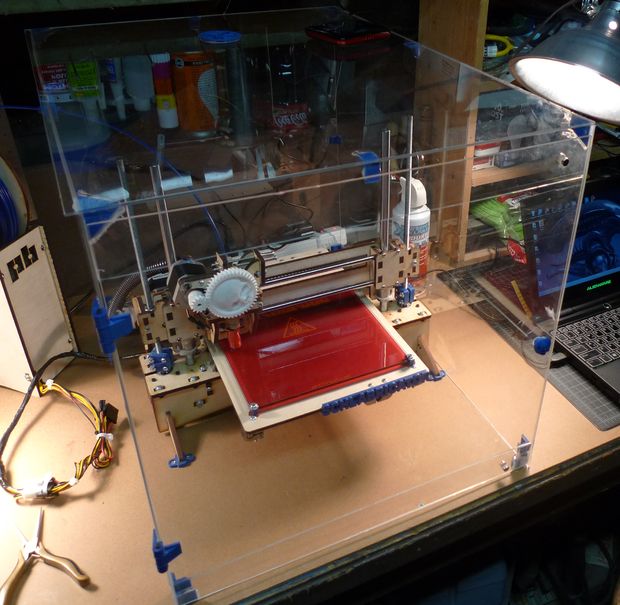
The picture above shows a relatively complex system posted on thingiverse. It uses a metal case with various printable parts. It has a complex anatomy and is carefully spaced to suit the printer. This particular one cost just under $400. It may seem expensive but it is a particular complex system with a heating sensor and very specific materials.
The advantage of complex DIY is that it can be suited precisely to you r printer and the type of prints you want to do. The system shown above also looks more sturdy and the setup makes it easier to change things and readjust the printer.
Other examples of complex enclosures:
Instructables has quite a few examples on it but one of the best is this one by user Schlem. This enclosure is comprised of a series of plexiglass panels conjoined by corners made of ABS hinges and corners. He printed the conjoining parts using ABS. It’s a great design that provides unparalleled transparency and decent ventilation options.
Robert Sojak created a great enclosure using a simple frame with a bunch of ingredients including 10×10 mm laths, small hinges, couple of screw latches, handful of small angle brackets and 6 meters of window insulation strip. It consists of acrylic panels, hinges, lock nuts and screw latches. It’s a sleek design which is a lot less work than it looks if you’re good at cutting wood. I has a place of the side for a fan and additional electronics.
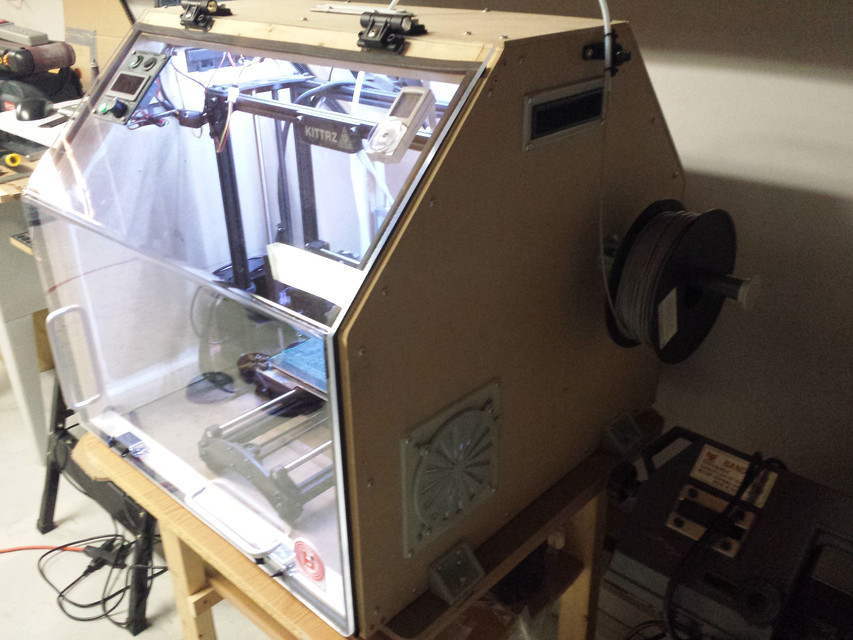
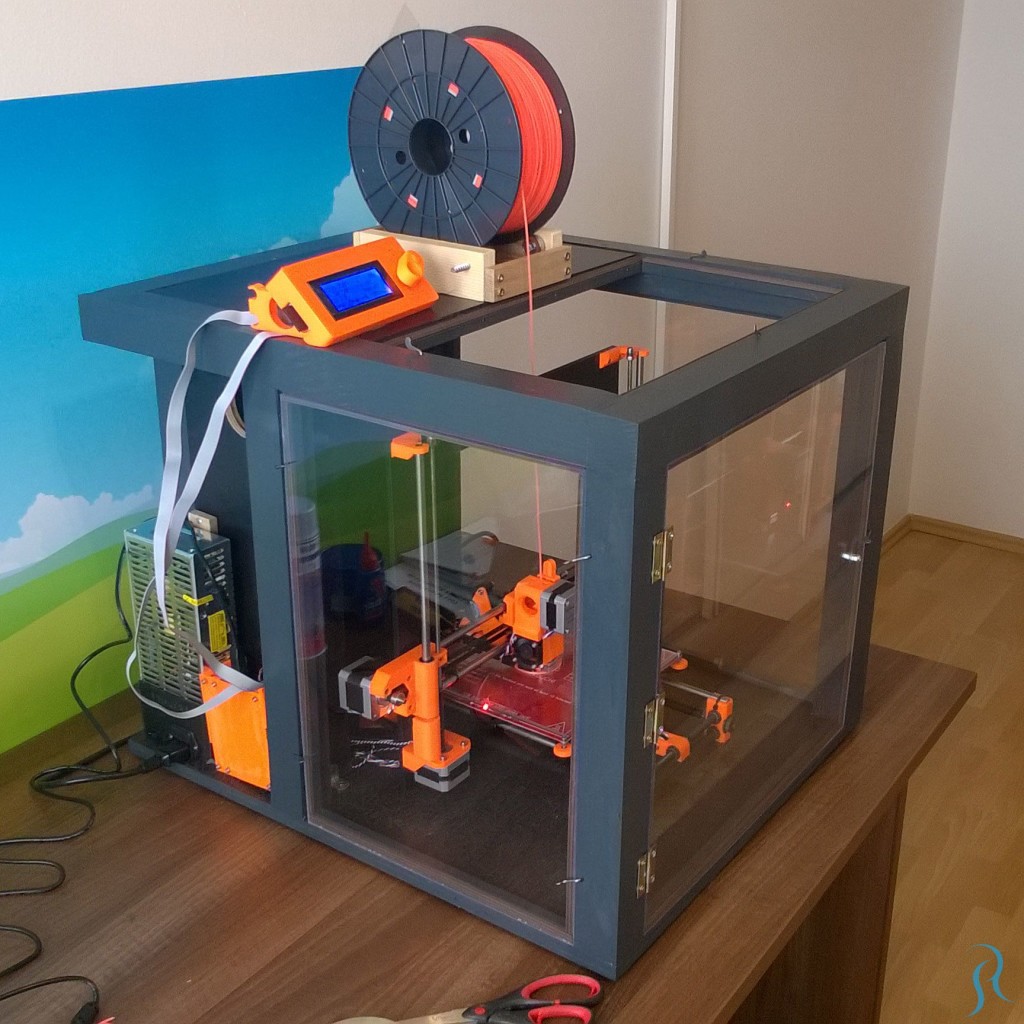
Quite like the last one, if you prefer to work with a wooden frame, GrabCad has a great tutorial on how to build this fantastic enclosure. Originally built by a user named Jonathan, this “hotbox” enclosure is sleek and functional. It’s sort of reminiscent of the LeapFrog Bolt in the way that the front panel curves in the middle.
The hotbox is suitable for any printer that can fit into a 26x26x24 space. It has a removable hood, some LEDs for adequate lighting a space for a cooling fan. It requires an integrated 72 W power supply to power the fan and the LEDs as well. The hotbox requires quite some work to make but is definitely one of the most impressive enclosures out there.


